Shifu Cloud Debut
On 2022.10.18, Shifu Cloud was officially announced to the public, and users can quickly integrate their devices into Shifu by simply filling in fields in the UI.
In this day's live online demonstration, Yang Xijie from Edgenesis demonstrated how to use Shifu Cloud to access three physical devices and develop applications based on them. Let's review the process together!
Creating the cluster & Installing shifu
Before using Shifu Cloud, we need to make sure we have already installed Shifu on our computer.
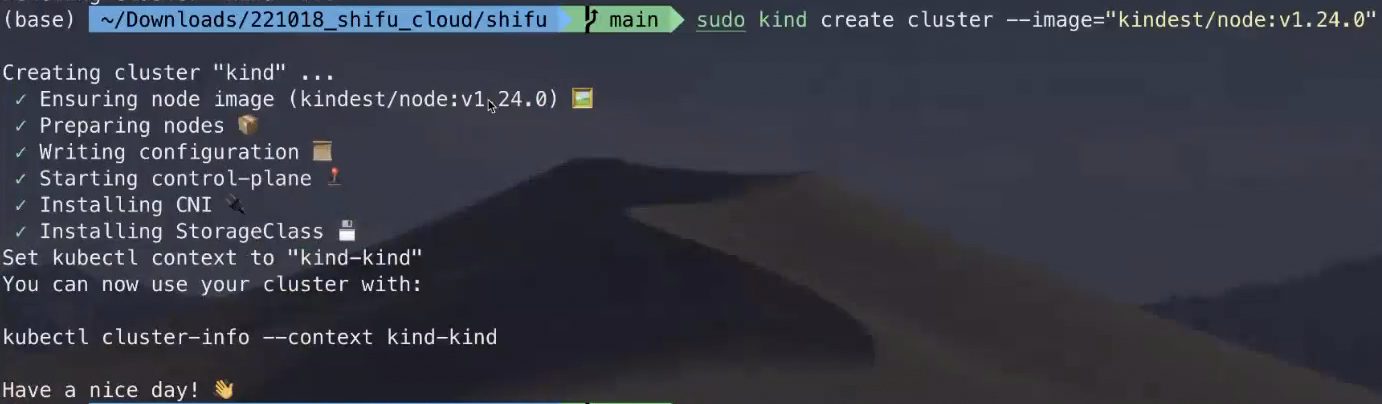
# Start the k8s cluster locally using kind
$ sudo kind create cluster --image="kindest/node:v1.24.0"
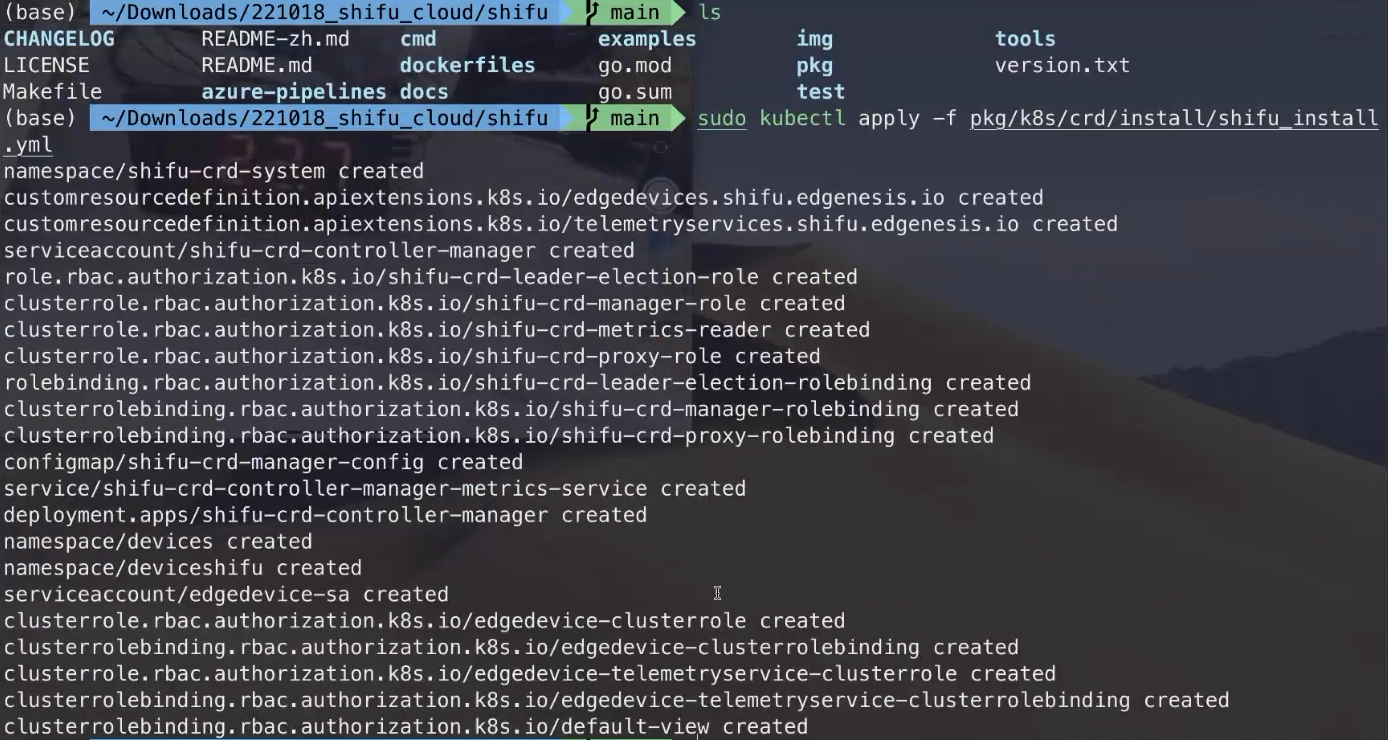
# Clone the shifu repository and install it
$ git clone https://github.com/Edgenesis/shifu.git
$ cd shifu
$ sudo kubectl apply -f pkg/k8s/crd/install/shifu_install.yml
If you would like to know how to install Shifu and test it locally, you may want to check out download and install and local installing testing.
Connecting to thermometer and LED
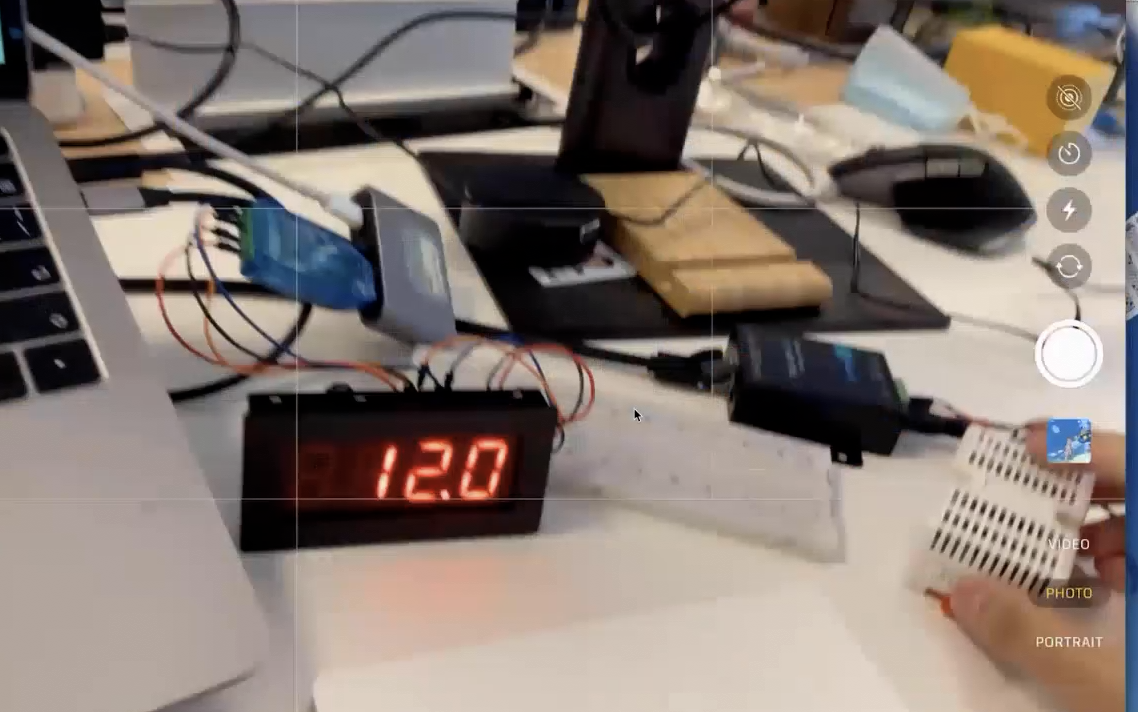
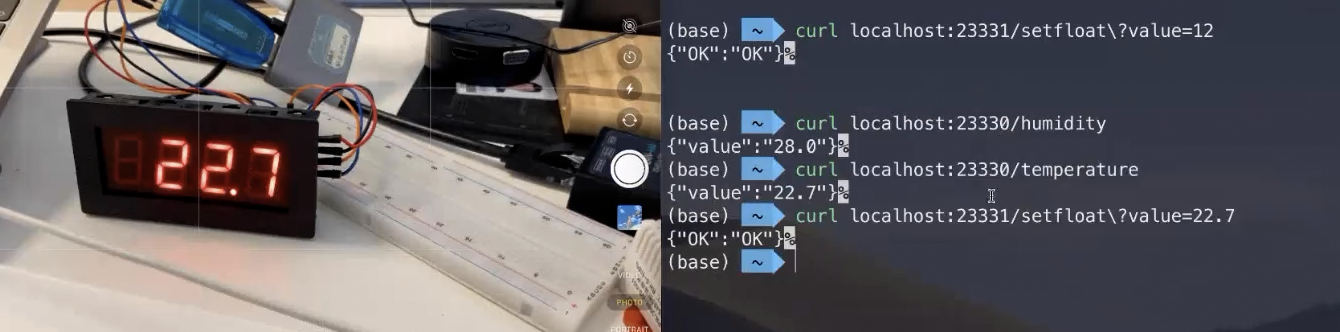
The devices we want to connect to are respectively an RS485 thermohygrometer and an RS485 LED display. The thermohygrometer is connected to the host PC (computer) via a serial server, and the LED display is connected to the host PC via an RS485 to USB chip. Here we don't want to bother you with any detail, and after the host computer opens the HTTP service:
- You may visit
localhost:23330/temperatureto get the temperature from the thermohygrometer - You may visit
localhost:23330/humidityto get the humidity from the thermohygrometer - You may visit
localhost:23331/setfloat\?value=123.4, fillvaluewith the number you need to display on the LED
curl localhost:23330/temperature
curl localhost:23330/humidity
curl localhost:23331/setfloat\?value=123.4
Next we're going to integrate the two devices into Shifu, which means that the two pjysical devices (edgeDevices) are converted to digital twins (deviceShifus) in the k8s cluster.
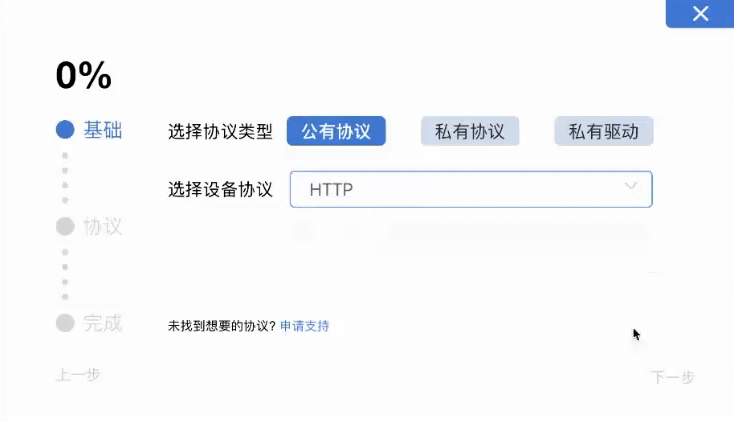
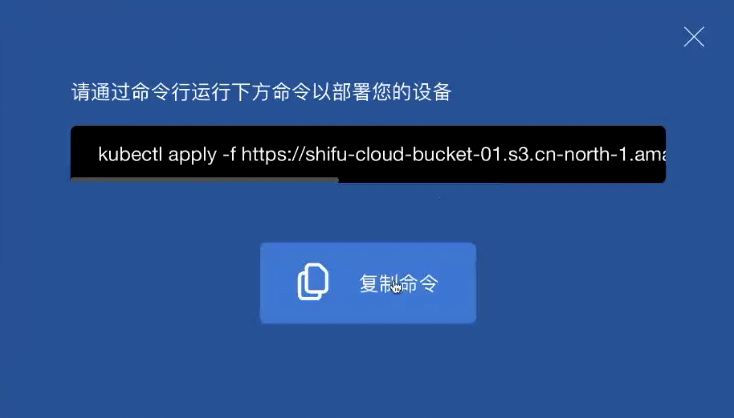
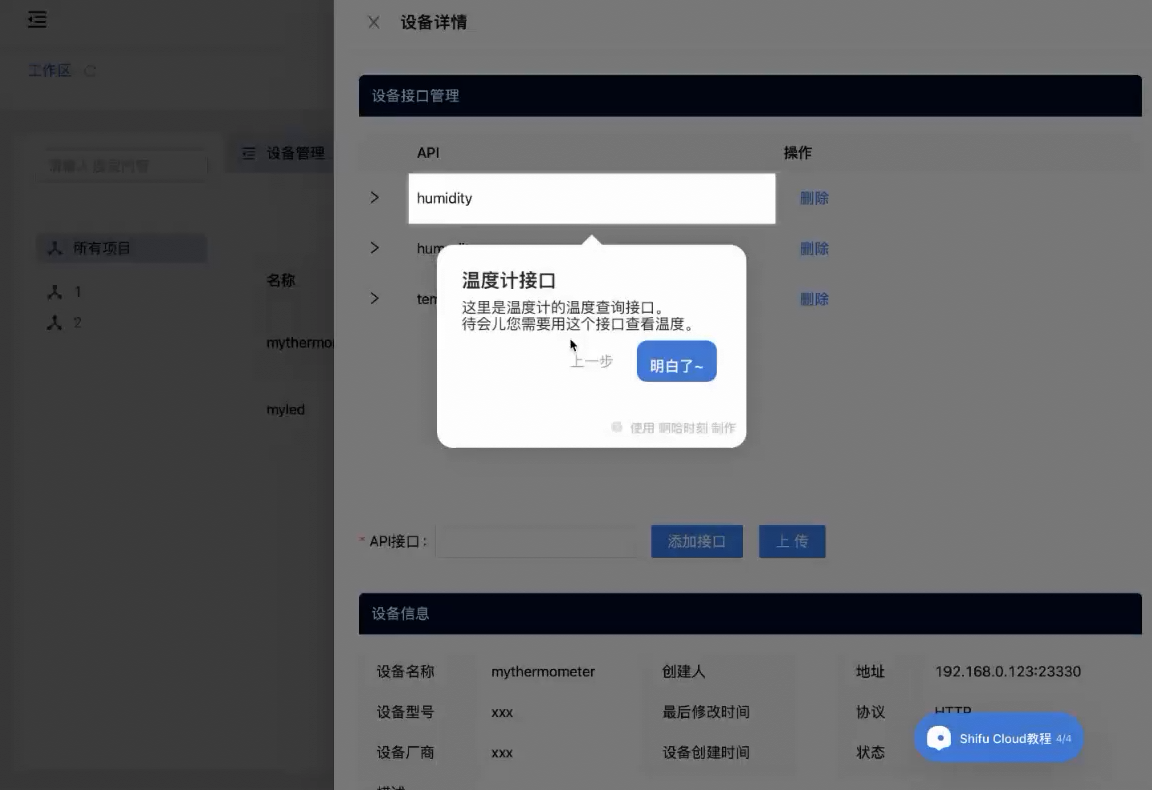
Generating configuration file with one click
Shifu Cloud can easily generate configuration files for deviceShifu.
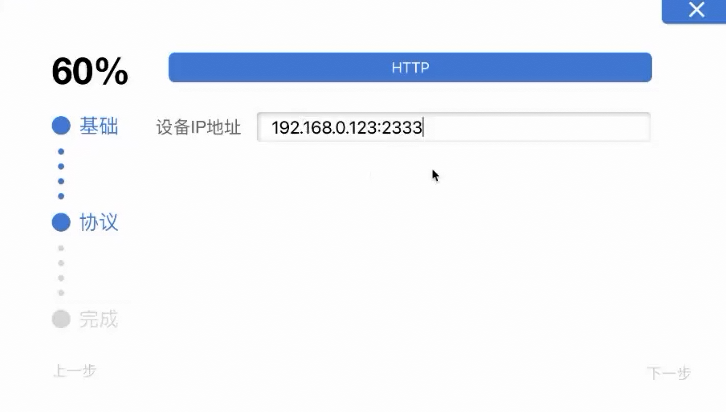
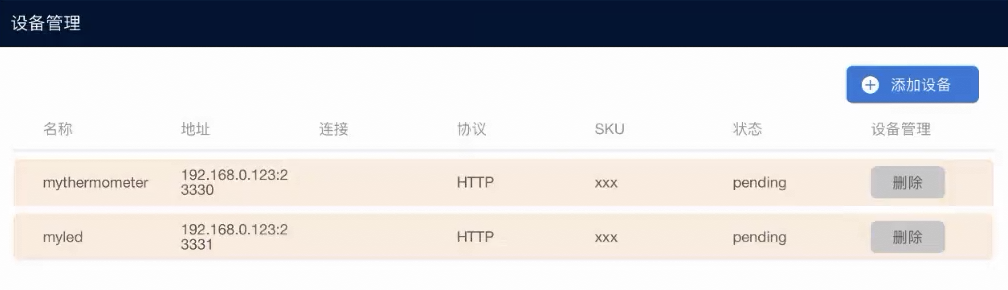
After logging in, click "All projects" to add devices. Both devices use HTTP protocol, so choose Public Protocol > HTTP. The IP address of the device cannot be written as localhost, you need to find the local IP in the network settings of your computer. For the demonstration, we used 192.168.0.123:23330 and 192.168.0.123:23331.

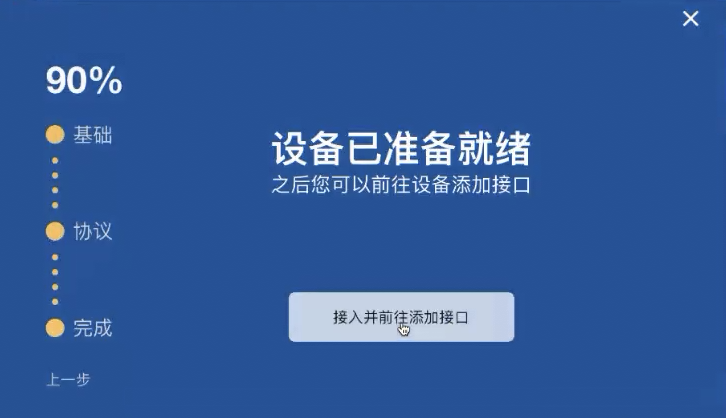
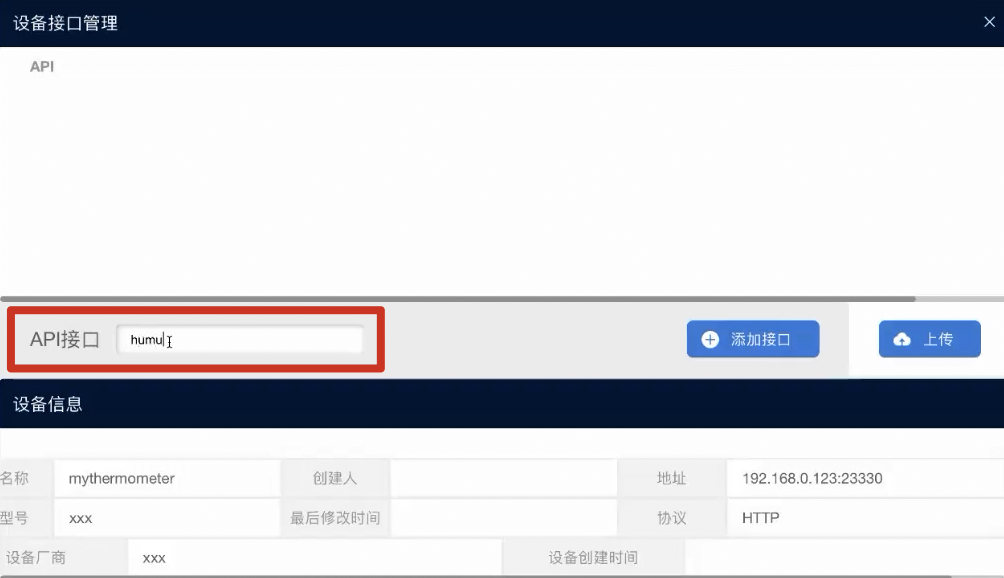
Once the information is filled in, a command pops up on the website, click the button on the right to copy it to the terminal and execute it to deploy the device to the local k8s cluster. This saves the time of manually writing YAML configuration files and is more convenient.

Testing if the device has been successfully integrated
We can go into the cluster to see if we could access the digital twin of both devices using the network address within the cluster:.
## Run an nginx container
$ sudo kubectl run --image=nginx:1.21 nginx
# Enter the nginx container
$ sudo kubectl exec -it nginx -- bash
# Interact with the device
$ curl http://deviceshifu-mythermometer-service.deviceshifu.svc.cluster.local/humidity
$ curl http://deviceshifu-mythermometer-service.deviceshifu.svc.cluster.local/temperature
$ curl http://deviceshifu-myled-service.deviceshifu.svc.cluster.local/setfloat?value=321
You can see that the thermometer reading and the LED display settings are working properly, which means that devices have been successfully converted to digital twins.
Packaging the application as an image
We are going to develop the application based on the thermometer and LED, here's the Python program we wrote:
main.py
import time
import requests
import json

isLocal = False
localIp = "192.168.0.123"
flag = -1
while True:
    flag += 1

    # [get data]
    if flag % 2 == 0:
        # Get temperature
        url = f "http://{localIp}:23330/temperature" if isLocal else "http://deviceshifu-mythermometer-service.deviceshifu.svc.cluster.local/temperature"
    else:
        # Get humidity
        url = f "http://{localIp}:23330/humidity" if isLocal else "http://deviceshifu-mythermometer-service.deviceshifu.svc.cluster.local/humidity"
    res = requests.get(url)

    # [convert data]
    try:
        value = json.loads(res.text)['value']
        print("DEBUG", value)
        # [display data]
        led_url = f "http://{localIp}:23331/setfloat?value={value}" if isLocal else f "http://deviceshifu-myled-service.deviceshifu.svc.cluster.local/setfloat?value={value}"
        requests.get(led_url)
    except:
        print("DEBUG", res.text)

    time.sleep(2)
The program reads the temperature and humidity of the thermohygrometer alternately every 2 seconds and displays the readings on the LED display.
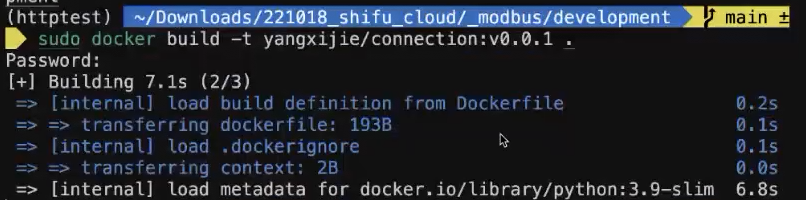
Next we want to package this program as an image, so that we can load the image in the cluster and run:
requirements.txt
requests
Dockerfile
FROM python:3.9-slim-bullseye

COPY requirements.txt .
RUN pip install --no-cache-dir -r requirements.txt

COPY main.py .
CMD ["python3", "main.py"]
# Build the image
$ sudo docker build -t xxx/connection:v0.0.1 .
# Make sure the image has been built
$ sudo docker images | grep connection
xxx/connection v0.0.1 a9526147ddad 2 minutes ago 125MB
# Load the image into the cluster
$ sudo kind load docker-image xxx/connection:v0.0.1
# Run the container as an instance of the image
$ sudo kubectl run --image=xxx/connection:v0.0.1 connection-name
Accessing the camera
Next we want to access the Hikvision camera. The camera is not nearby, it is connected wirelessly by Wi-Fi.
You can see that Shifu Cloud supports this module of Hikvision, click on it and configure the camera ip address, username and password to access it with one click. The device name in the demo is mycamera.
# Enter the nginx container
$ sudo kubectl exec -it nginx -- bash
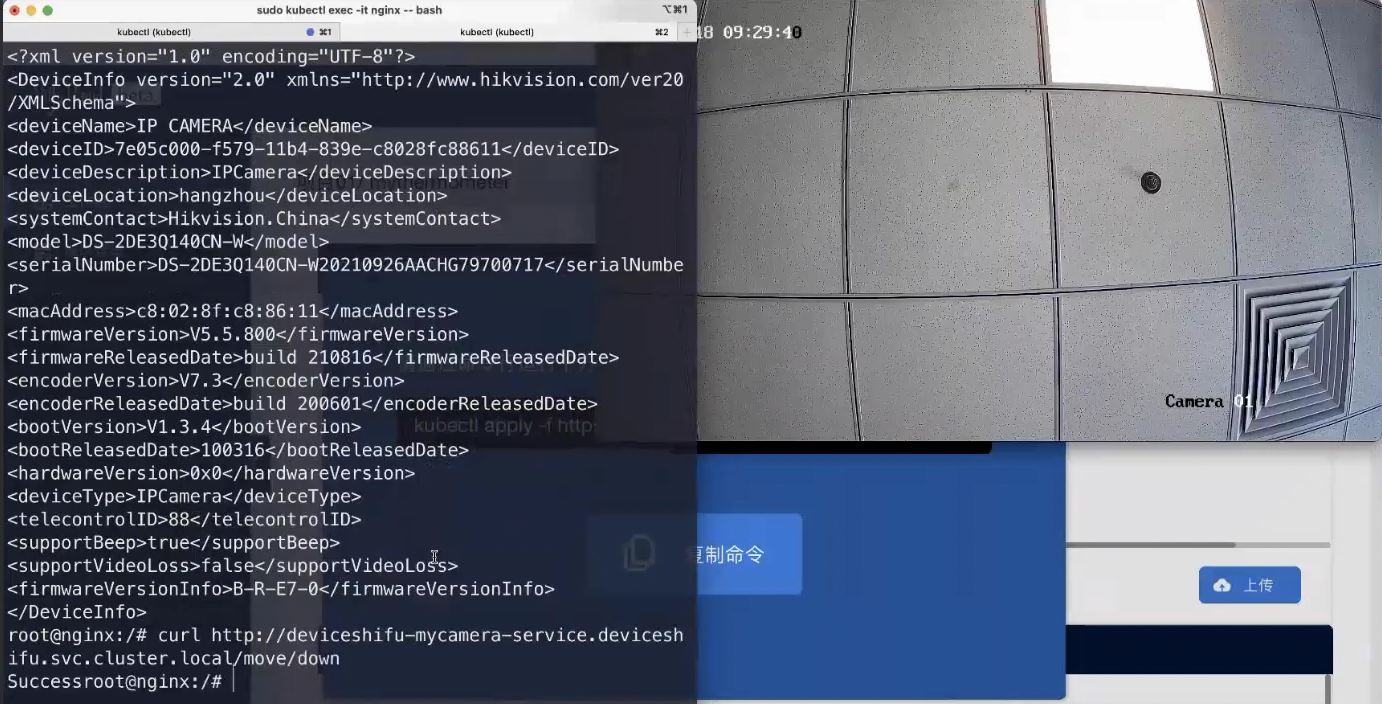
# Check camera information
$ curl http://deviceshifu-mycamera-service.deviceshifu.svc.cluster.local/info
This means that the Hikvision camera is integrated into Shifu and has been converted to a digital twin.

Controlling the position of a camera
Immediately after that, we want to adjust the camera's position, and the camera's orientation can be controlled using APIs like move/up move/down move/left move/right.
$ curl http://deviceshifu-mycamera-service.deviceshifu.svc.cluster.local/move/up
To check the outcome, we turn on the video player on our computer and open that streaming address: rtsp://<user_name>:<password>@<ip_address>. In macOS, we can open IINA.app, go to menu bar > Open Url... > paste and enter, and we can see the live surveillance video stream.
As you can see, the camera position has changed, and we managed to reorient the camera to the angle we need(the angle of the camera moved from the ceiling to the back the computer screenon the desk).

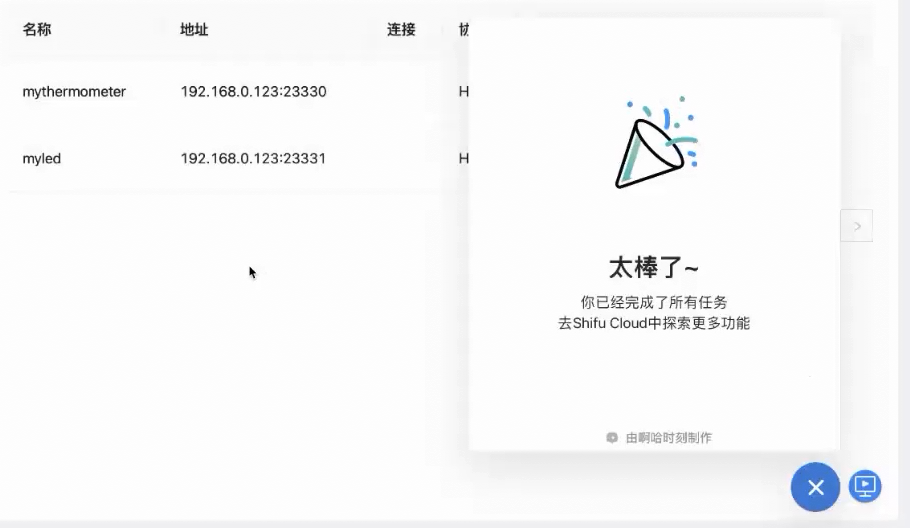
Summary
In this demonstration, we used Shifu Cloud to access three devices, and if you compare it to our first Meetup, you will see that we have achieved faster integration and lowered the threshold of integrating a device.
Shifu Cloud includes an Aha Moment to help you get familiar with this website.
In the future, Shifu Cloud will offer:
- More protocol support (both Edgenesis and the open source community will continue to support more protocols to improve the coverage of fast access)
- Application development support (for now we still need to package applications we developed locally, but in the future, we can develope applications on Shifu Cloud
- App store support (which contains apps uploaded by developers or third-party plugins that users can install with one click)
Thank you for reading this, let's stay tuned to future progresses of Shifu Cloud!